Custom widgets
AWE lets you extend the UI it provides with your own JavaScript components — including third-party libraries and their styles — by embedding them in a screen through the <widget> element. Widgets are resolved by their type, so you can plug in whatever you need at the application level without modifying the framework.
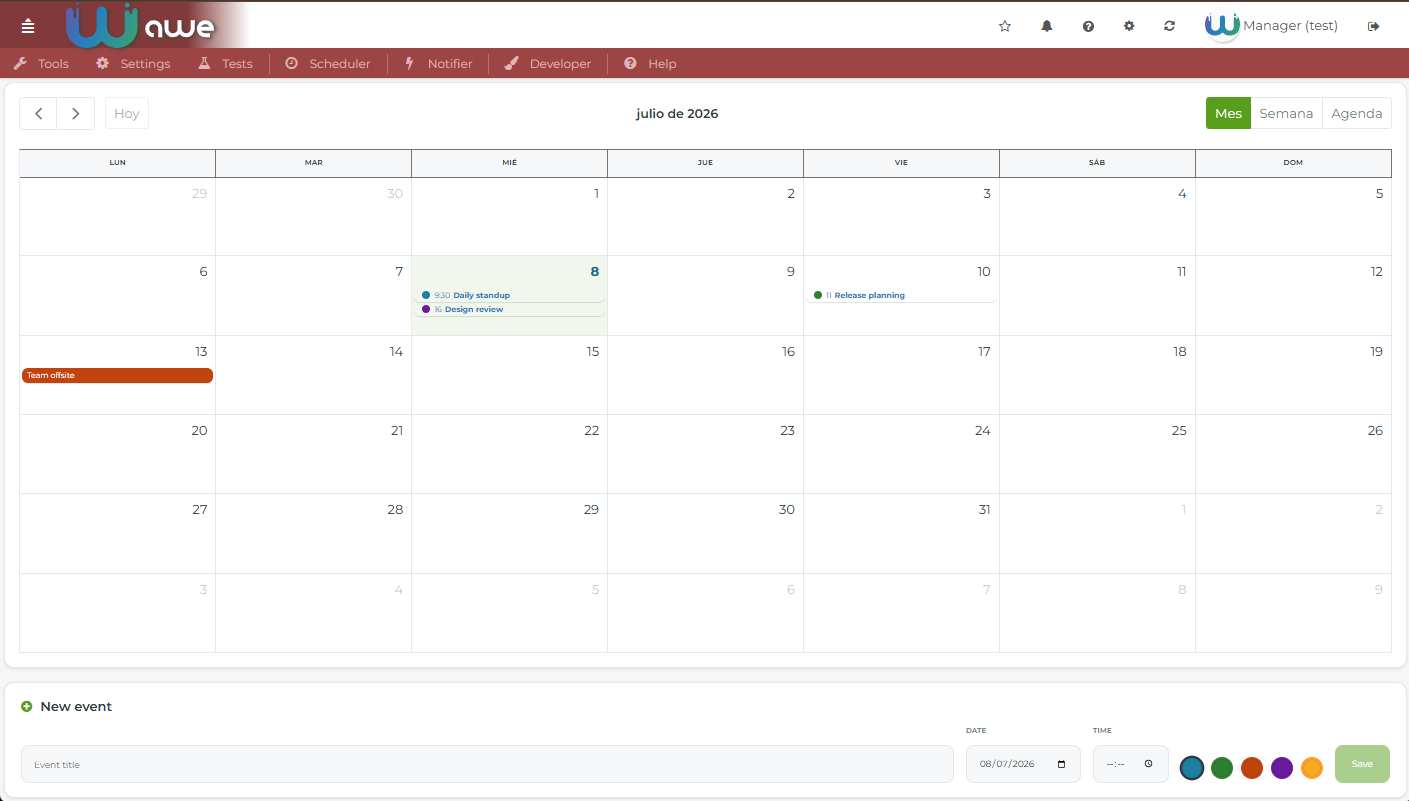
This guide walks through a complete, working example: an event calendar (built on the third-party FullCalendar library) added to the awe-boot demo application.
How it works
When you place a widget in a screen:
<widget type="event-calendar" id="eventCalendar" style="expand"/>
the backend renders it as a custom element named after type:
<awe-event-calendar event-calendar-id="eventCalendar"></awe-event-calendar>
The AngularJS client resolves that element against its directive registry. So all you need is a directive named aweEventCalendar registered in your application bundle — no changes to the framework core. If no directive matches the type, the client shows a graceful placeholder instead of failing.
Steps
1. Add the library dependency
Install the component library in your project (here, FullCalendar):
npm install --save @fullcalendar/core @fullcalendar/daygrid @fullcalendar/timegrid @fullcalendar/interaction
2. Write the widget directive
Create a directive under src/main/resources/js/directives/. Key points:
- Register it with
aweApplication.directive('aweYourWidget', ...).aweApplicationis a global exposed by the main AWE bundle, so reference it directly (no import needed). - The element attribute
<type>-idbinds the component id; expose it as the isolate scope propertywidgetId. - Integrate with the framework lifecycle through the
Componentservice.
import {Calendar} from '@fullcalendar/core';
import dayGridPlugin from '@fullcalendar/daygrid';

aweApplication.directive('aweEventCalendar',
  ['Component', '$timeout', 'AweSettings',
    function (Component, $timeout, $settings) {
      return {
        restrict: 'E',
        replace: true,
        scope: { widgetId: '@eventCalendarId' },
        template: '<div class="awe-ec"><div class="awe-ec-mount"></div></div>',
        link: function (scope, element) {
          // Integrate as a framework component
          const component = new Component(scope, scope.widgetId);
          if (!component.asComponent()) {
            return false;
          }

          // Mount the third-party component once the node is laid out
          $timeout(function () {
            const calendar = new Calendar(element[0].querySelector('.awe-ec-mount'), {
              plugins: [dayGridPlugin],
              initialView: 'dayGridMonth',
              locale: $settings.getLanguage(),   // follow the AWE language
              events: [/* ... */]
            });
            calendar.render();

            // Release resources with the widget
            scope.$on('$destroy', () => calendar.destroy());
          });
        }
      };
    }
  ]);
Read the current language with AweSettings.getLanguage() (returns codes like en-GB, es-ES) and re-localize at runtime by listening to the framework event: scope.$on('languageChanged', (e, lang) => calendar.setOption('locale', map(lang))). Do not rely on the browser language.
Do not use alert() / confirm() / prompt() inside a widget: they block the AngularJS digest. Build your own inline UI, and wrap library callbacks that mutate scope in scope.$applyAsync(...).
3. Register the directive in your bundle
Add a require for your directive in the application webpack entry (src/main/resources/webpack/app.config.js) so it is included in the bundle:
require("../js/directives/eventCalendar");
4. Add the styles
Put your widget styles under src/main/resources/less/ and import them from main.less:
// main.less
@import "./awe/event-calendar.less";
Third-party libraries usually expose CSS custom properties you can override, scoped to your widget, to blend with the active AWE theme.
5. Add the screen
Create a screen that embeds the widget:
<screen template="full" label="MENU_TEST_EVENT_CALENDAR"
        xmlns:xsi='http://www.w3.org/2001/XMLSchema-instance'
        xsi:noNamespaceSchemaLocation='https://aweframework.gitlab.io/awe/docs/schemas/screen.xsd'>
  <tag source="center">
    <widget type="event-calendar" id="eventCalendar" style="expand"/>
  </tag>
</screen>
6. Add the menu option and locales
Register a menu option pointing to the screen and add the locale keys used by the screen/widget:
<!-- menu/private.xml -->
<option name="event-calendar" label="MENU_TEST_EVENT_CALENDAR" screen="event-calendar-test" icon="calendar"/>
<!-- locale/Locale-en-GB.xml -->
<locale name="MENU_TEST_EVENT_CALENDAR" value="Event Calendar"/>
Notes
typeis the extension key — it is a free string, so you are not limited to a fixed set of components. Screen/profile restrictions remain the right place to control access.- Pass configuration to the component with
<widget-parameter>; it reaches the directive throughcomponent.controller.parameters. - React client: the
awe-reactclient currently resolves widgets against a built-in registry; app-level registration of custom widgets is tracked as a separate enhancement. This guide targets the AngularJS client.